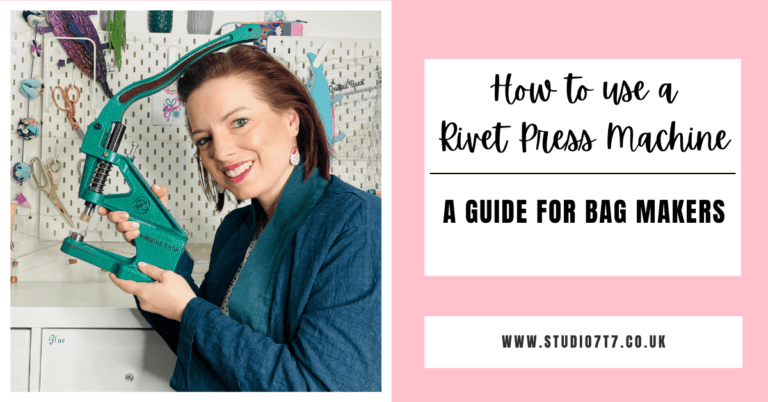
In this guide, I will show you how to use a rivet press machine as a beginner bag maker. If you have been using a hole puncher and hammers for your projects you will agree with me when I say it can be a mission when working in batches, hence today I want to introduce you to this big green machine that will make your life easier.
I decided to get myself a rivet press machine during lockdown and I got it from the Trimming shop.
If you’re in the UK, this is pretty much the only place to get them at a decent price, good thing they are sellers on Amazon as well.
How does the Rivet Press Machine work?
It is a rivet press so you just literally push down the handle, it is big and quite heavy but I can use it while seated. If you are working on thick material or maybe working in a batch you might have to stand up.
Below I will show you the step-by-step process with pictures on how to use this rivet press machine with different dies depending on the hardware you want to put in. You can also see my tutorial video on YouTube going into more visual details. I used this rivet press machine in this tutoral of my Shark backpack pattern as well.
If you are really into sewing and are looking to go from So-So to Sew Spectacular then you should join The 7t7 Club. The classes and inspiration will keep your sew-jo and there’s a community of like-minded people all supporting each other and helping, and they are all sewing the same thing! See you there!
Components of a rivet press machine

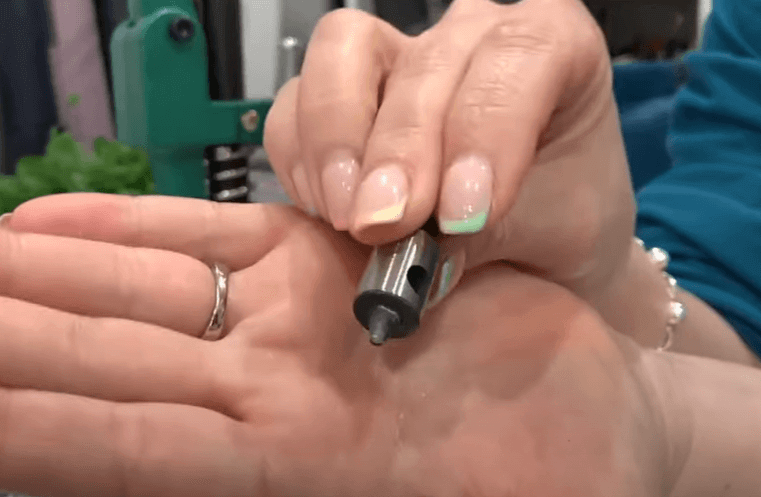
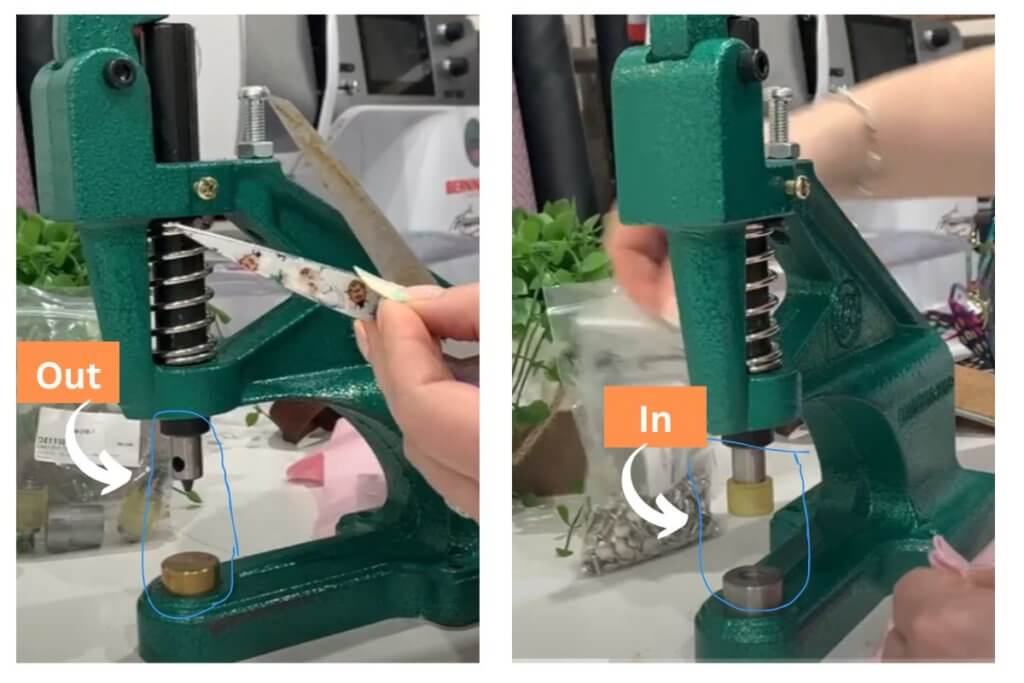
Die
These are rivet dies they screw in and out. The top one tends to screw in and the bottom one just slots in. There are different dies according to the different hardware that you want to put in, you can get rivets, magnetic snaps, and press snaps. There are quite a few on the market so take your time, and have a look at the ones that are suitable for you. Mine in the picture above is a 9mm size die.
This one is a hole die, this would be great if you are batch-making stuff and you want to cut a load of holes at the same time and then you’re gonna put a lot of rivets and at the same time then this is a great die to have. Alternatively, a hand puncher still does a good job
How to punch holes using the revit press machine
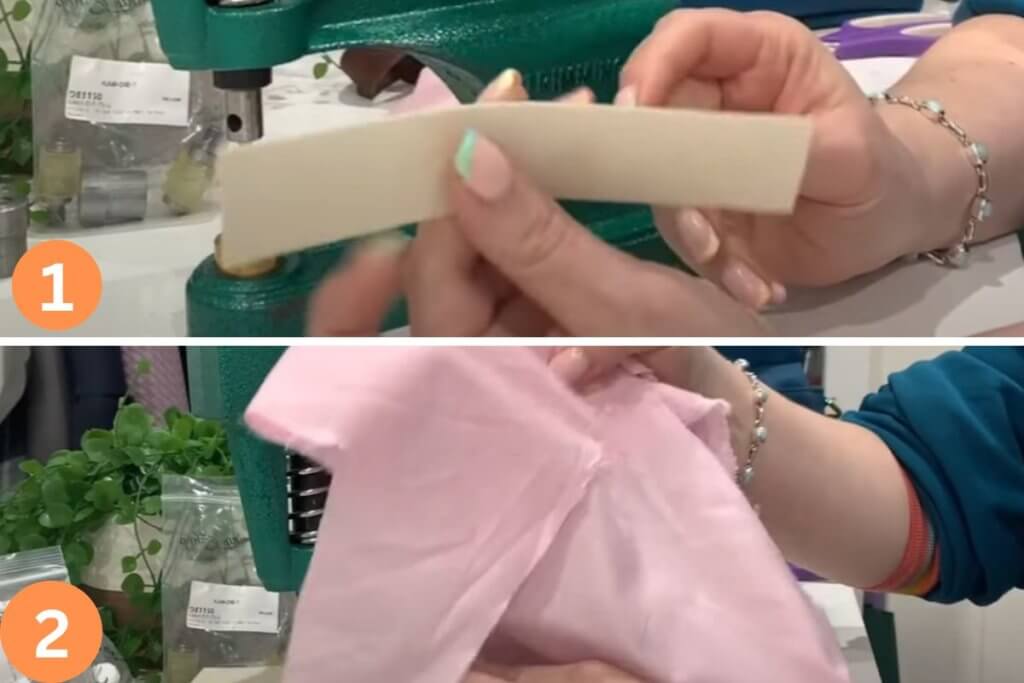
1. Prepare material! I recommend you use decovil if you are using light fabric like myself in this tutorial. When I’m cutting out my decovil and there are any offcuts, I keep them and put them to one side. I have a little pot that I can just dip into when I need a little off-cuts, so that’s why it’s in the strip.
2. You are going to use high-quality cotton fabric or leather.
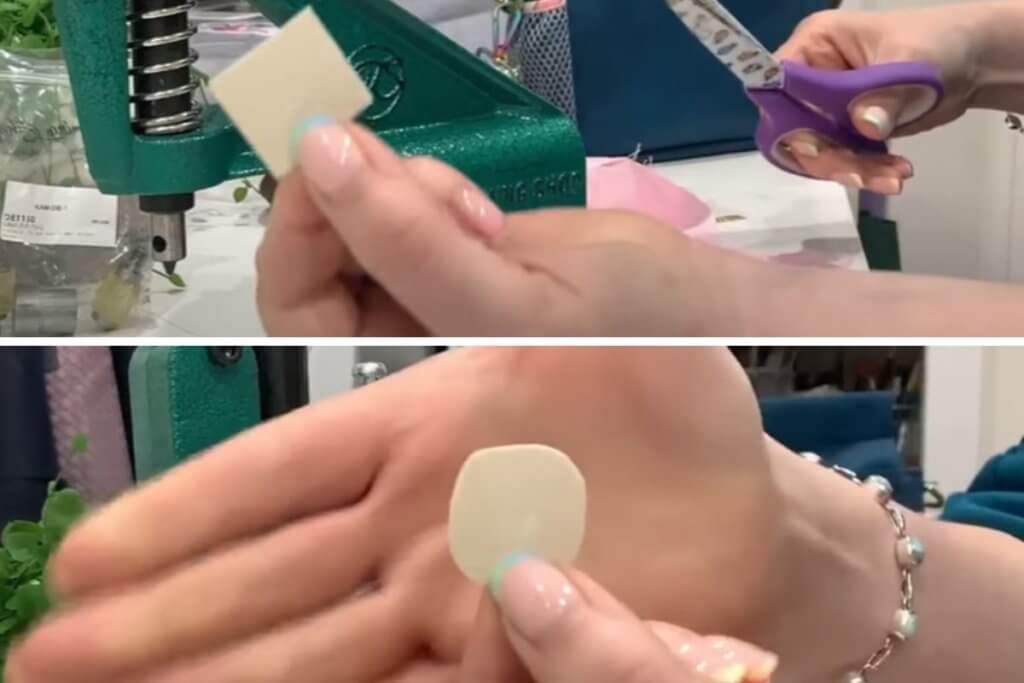
3. I always cut the decovil into a square box, it doesn’t have to be perfect. And then I always round off the edges or corners, they don’t have to be perfect. The reason why I do this is, if that shape does show through, it shows through sometimes because the decovil is a bit tougher than the outer fabric. The circular edges or the rounded edges are much more pleasing to the eye than big hard corners which are going to be more obvious.
4 Sandwich the decovil in between your outer material and inner lining. For this tutorial, I folded the material into layers to up the thickness of it.
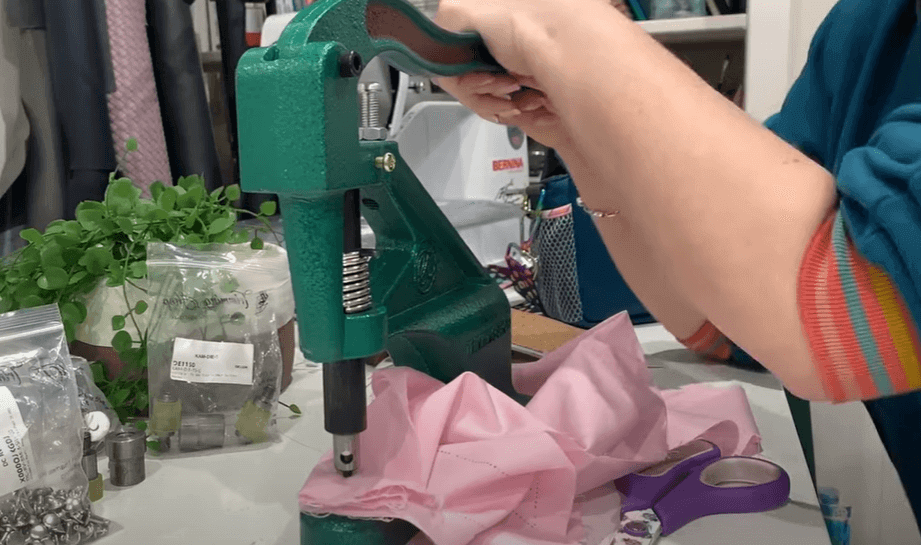
5. The next thing I do is, I’m going to make a hole so I’m gonna put it in a way that the decovil is in the centre so the hole ends up in the middle of the decovil. I will then press the handle of the rivet press machine to make holes all the way through those layers.
6. You can remove the hole punch die and replace it with a rivet die. PRO TIP, Please ensure that you keep your dies in a fairly organised way. It is so easy to get them mixed up and once they are mixed up they are super confusing.
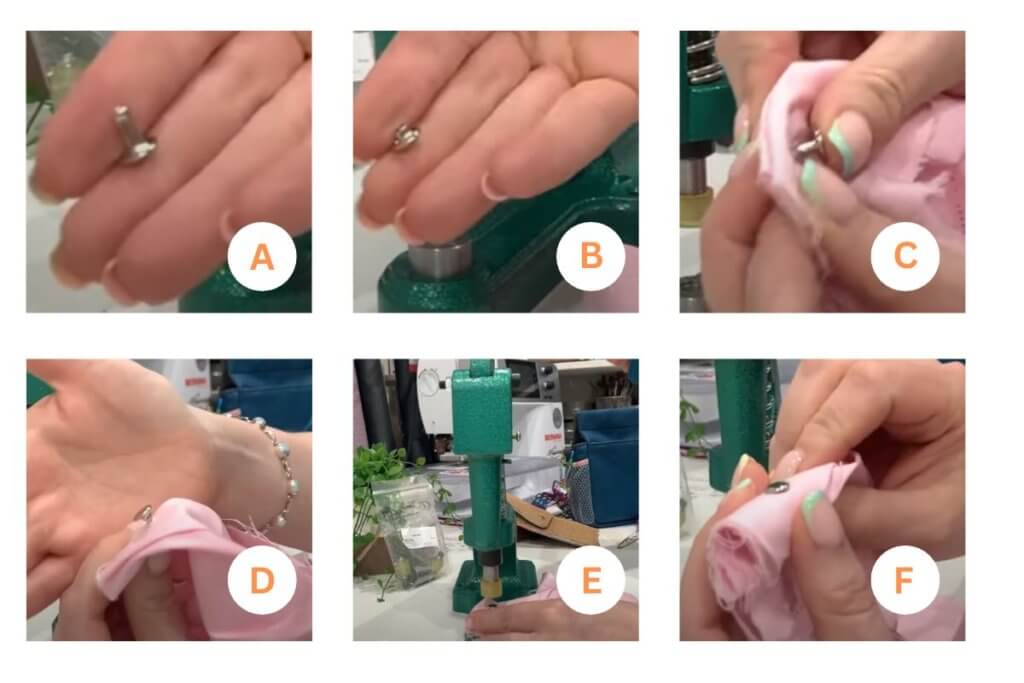
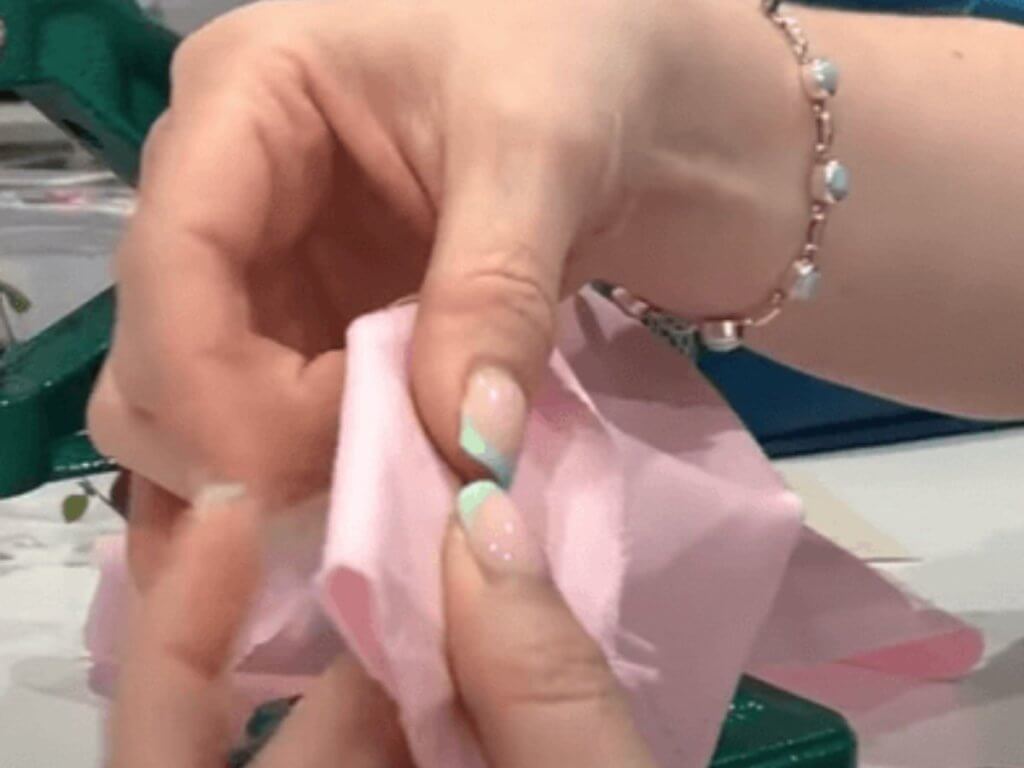
7. Once you’ve screwed in the die, you need to get your rivets. I call them the male end and female ends, see images A & B. Then I’m gonna push the male end through those holes that I made in step 5, see image C. Then close it with the female end (image D) before putting it on the rivet press machine (Image E). I’ve placed it on the die with the female end cap sitting into the base of the die then pushed it down with the rivet press machine. See the final product of the rivet on image F.
How to attach a snap using rivet press machine
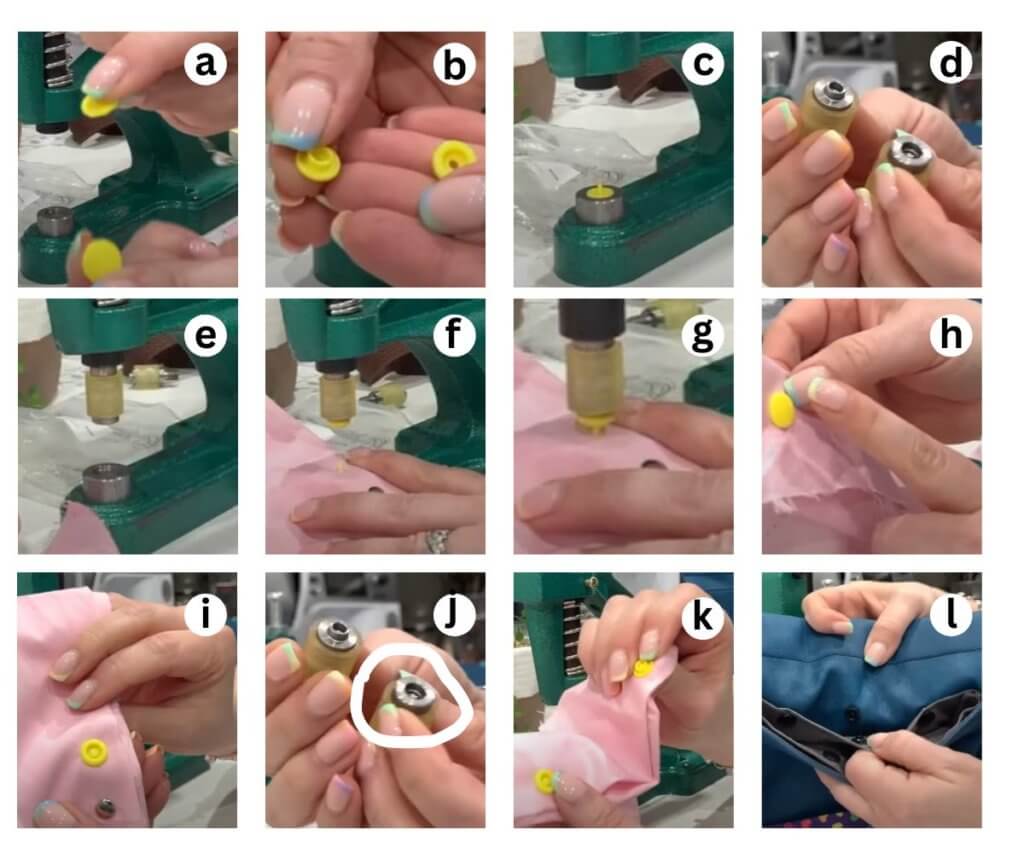
1. You will need two of the same caps and one of each backing (male and female) part of the snaps. See image A & B
2. You also need the snap rivet, the base is where the caps go. Image C
3. Then the two ends of the dies for snaps which are different from the example. See image D for reference, one is the male side and the other one is the female but you’re going to do the opposite to the actual snap. So if you’ve got the male side of the die, you’re going to put the female side of the snap, and it will just clip on. The same applies to the female die. Then screw the die onto the rivet press machine (Image E).
4. Push the cap through the material, then on the base is where you are going to place the cap (Image F) and press down the rivet machine (Image G). You don’t need too much pressure or power to do this. In image H & I is how the cap will look like, as well as the female snap.
5. Then you are done with this one side of the snap, now you need to change the die (Image J) and put the opposite die.
6. Push that cap through the material again on the other side where the opposite snap is supposed to be.
7. Clip the snap onto the die and cap (through material) on the base then press the rivet press machine. Note: Please make sure that you push down a couple of times because if the kind of pointy middle part inside the snap isn’t squished down, that’s the bit that will keep it onto the press so you want to make sure that it is flattened so that it all works nicely. Image K is the end result and image L is an example of snaps on a handbag I made previously.
How to attach a magnet clasp using rivet press machine
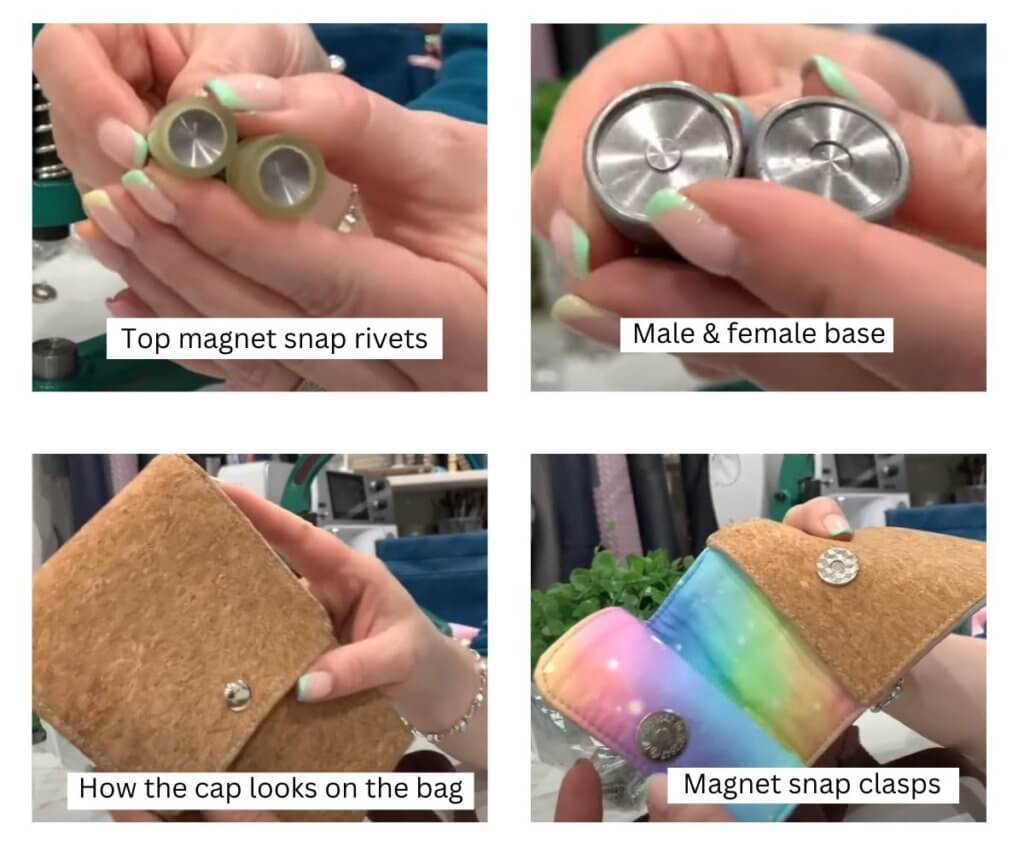
1. You will need magnetic snap clasps, in this example, I used an 18-millimetre double-capped one.
2. The die consists of two bases (male and female) and a top die. Here you will need to change the base only.
3. The male base goes towards the female part of the magnetic snaps, and vice versa with the female base.
4. The process is closely the same as above, see my full tutorial video on YouTube where I take you through how to use the rivet press machine
If you like this rivet press machine, I think you will also like one of these best bag making tools. I covered bag making tools for both beginners and for more advanced intermediate bag makers.